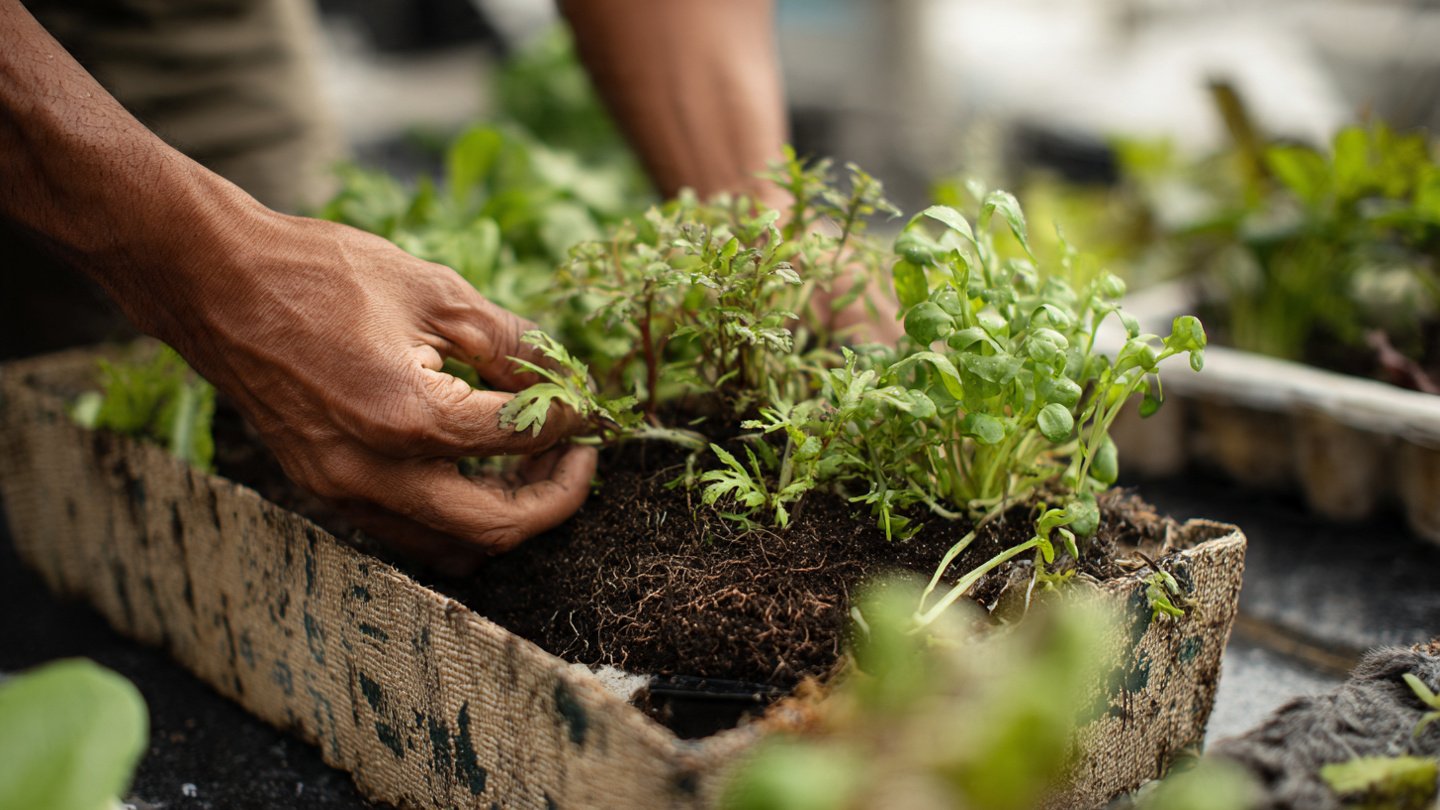
In an era where sustainable living is becoming increasingly vital, gardening enthusiasts are seeking innovative ways to cultivate their own food while minimizing environmental impact. One of the best approaches to achieving both is by growing greens in recycled containers. This method not only helps reduce waste but also offers an accessible, cost-effective way to engage in gardening, even in limited spaces. This article will guide you through every step of setting up your container garden, choosing suitable plants, and ensuring a thriving, sustainable environment.
The Benefits of Growing Greens in Recycled Containers
Growing greens in recycled containers comes with a plethora of benefits:
Latest Posts
- A Comprehensive Guide to Successfully Growing Grape Vines in Your Backyard for Beginners and Experts Alike
- Best Tips for Successful Mango Growth in Containers
- Discover the Simple Steps for Successfully Growing Coriander in a Pot
- Discovering the Ultimate Guide to Growing African Violets from Leaf Cuttings
- Simple Techniques for Successfully Growing Seedless Grapes in Home Gardens
- Ultimate Guide to Growing Balsam Plants Naturally for Vibrant Blooms
- Discover the Secrets to Growing Lush Leek Leaves with Simple Hacks for Beginners
- How to Successfully Cultivate Sweet Cherries in the Unique Climate of Canada
- The Ultimate Guide to Successfully Growing Beautiful Succulent Garden Plants at Home
- A Comprehensive Guide to Growing Dhania from Seeds for Beginners
- Waste Reduction: Utilizing old containers helps divert waste from landfills.
- Cost-Effective: Repurposing materials eliminates the need for expensive gardening supplies.
- Space Efficiency: Perfect for urban dwellers and those with limited outdoor space. Even a small balcony or kitchen can accommodate a few container gardens.
- Customization: You can tailor your garden based on your design preferences and available materials, creating a unique aesthetic.
- Accessibility: Container gardening allows for easier access to vegetables and herbs, making it a great option for those with limited mobility.
Let’s explore how to start your own green garden using recycled materials.
Choosing Your Recycled Containers
Almost any container can be transformed into a planter as long as it meets certain criteria. Here are some popular options:
1. Plastic Containers
Great for growing lightweight greens. Look for:
- Grocery Bags: Cut holes in the bottom for drainage and reinforce the sides.
- Bottles: Two-liter soda bottles can be cut in half, with drainage holes added.

2. Tin Cans
Coffee cans, food tins, and even old paint cans make excellent pots. Rinse them out thoroughly and be sure to create drainage holes.
3. Wooden Boxes
Old crates or wooden pallets can be repurposed into charming planters. Line the wood with landscaping fabric to keep soil in place.
4. Rubber Tires
If your local regulations allow it, old tires can be stacked and used for growing various greens, though they must be lined to prevent direct soil contact.
5. Unused Furniture
Old drawers, bathtubs, or even a wooden ladder can be converted into multi-level gardens.
Preparing Your Containers
Once you have chosen your containers, it is essential to prepare them for planting:
1. Clean Your Containers
Rinse your containers thoroughly to remove any residues, chemicals, or dirt. For containers that previously held food, a mild bleach solution can help eliminate bacteria—be sure to rinse well afterward.
2. Ensure Proper Drainage
Without proper drainage, excess water can lead to root rot. Drill or punch holes in the bottom of your containers. If using items that cannot be drilled, consider elevating the containers on small blocks to promote drainage.

3. Add a Lining
If your container has large drainage holes, lining it with landscape fabric or newspaper can help retain soil while allowing excess water to escape.
Choosing the Right Soil
Soil choice is crucial for the health of your greens. A good-quality potting mix, ideally organic, offers the following benefits:
- Aeration: A well-draining mix allows roots to breathe.
- Nutrients: A good mix contains added fertilizers and organic matter to nourish your plants.
- Moisture Retention: Organic matter helps retain moisture without becoming too soggy.
Recommended Mixture
You may opt for a blend of the following:
- One part potting soil
- One part compost
- One part perlite or vermiculite (for aeration)
Selecting Your Greens
Growing greens in recycled containers allows you to experiment with different types. Here are some great options:
1. Leafy Greens
- Lettuce: Quick-growing and perfect for containers.
- Spinach: Thrives in cool temperatures and produces multiple harvests.
- Kale: Hardy and nutritious, kale can tolerate colder weather.
- Swiss Chard: Colorful and versatile, it grows well in a range of conditions.

2. Herbs
Adding herbs to your garden enhances flavor in your meals. Consider:
- Basil: Thrives in warmth and full sunlight.
- Parsley: A hardy herb that can tolerate some shade.
- Cilantro: Best in cooler weather; great for diverse cuisines.
3. Microgreens
Microgreens, such as arugula, radish greens, or beet greens, grow quickly and provide intense flavors. They are excellent for smaller containers.
Planting Your Greens
1. Timing
Consider the growing season for your chosen greens. Some prefer cooler weather while others thrive in warmth. Plant according to the seasonal guidelines for your region.
2. Planting Depth and Spacing
Each type of green will have specific requirements for planting depth. Follow the seed packet instructions closely. Here are some general guidelines:
- Leafy greens: Plant seeds about 1/4 inch deep, spacing them about 6–8 inches apart for larger varieties.
- Herbs: Generally, herbs need around 6–8 inches of space between them.

3. Sowing Seeds
Sprinkle the seeds evenly on top of the soil, then lightly cover them with potting mix. Gently press the soil to ensure good contact between the seeds and soil.
Care and Maintenance
1. Watering
Container gardens generally require more frequent watering, especially in warmer months. Here are some tips:
- Check soil moisture daily; water when the top inch feels dry.
- Water thoroughly until it drains from the bottom of the container.
2. Fertilization
Regular feeding is essential for container plants. Organic fertilizers, such as fish emulsion or seaweed extract, are good options. Follow the recommended dosage on the package to avoid over-fertilizing.
3. Weed and Pest Management
Monitor your plants regularly:
- Weeding: Remove any unwanted plants that might compete with your greens.
- Pests: Handpick any visible pests or use organic insecticidal soap to deter infestations.
Harvesting Your Greens

When you see ample growth and maturity in your greens, it is time to harvest! The method for harvesting will depend on the type of plant:
- Leafy Greens: Cut the outer leaves, allowing the inner leaves to continue growing.
- Herbs: Snip leaves as needed, encouraging bushier growth.
- Microgreens: Use scissors to snip them at the base when they are about 2–4 inches tall.
Enjoying Your Homegrown Greens
Using your homegrown greens can lead to delightful culinary experiences. Consider these ideas:
- Salads: Create fresh salads using a variety of greens and herbs.
- Smoothies: Add a handful of greens to your morning smoothie for added nutrition.
- Stir-fries: Incorporate fresh greens and herbs into stir-fried dishes.
Conclusion
Growing greens in recycled containers is more than just a gardening project; it is a statement of sustainability and creativity. By turning old materials into functional planters, you contribute to reducing waste while enjoying the many benefits of fresh, homegrown produce. Whether you have a spacious garden or a tiny balcony, this method provides endless opportunities for growing, learning, and nourishing your body and spirit.
So gather your recycled containers, choose your greens, and start your sustainable gardening journey today! Not only will you enjoy the fruits (and vegetables!) of your labor, but you’ll also positively impact the environment. Embrace this eco-friendly practice, and watch your garden bloom!