Growing your own vegetables has never been more rewarding, and among the greens you can cultivate easily at home is Pak Choi, also known as Bok Choy. This versatile and nutritious vegetable is not only a staple in Asian cuisine but also offers numerous health benefits. In this article, we will guide you through the simplest and most effective methods to grow Pak Choi greens at home, covering everything from preparation to harvesting. Additionally, we will address some frequently asked questions to help you on your gardening journey.
What is Pak Choi?
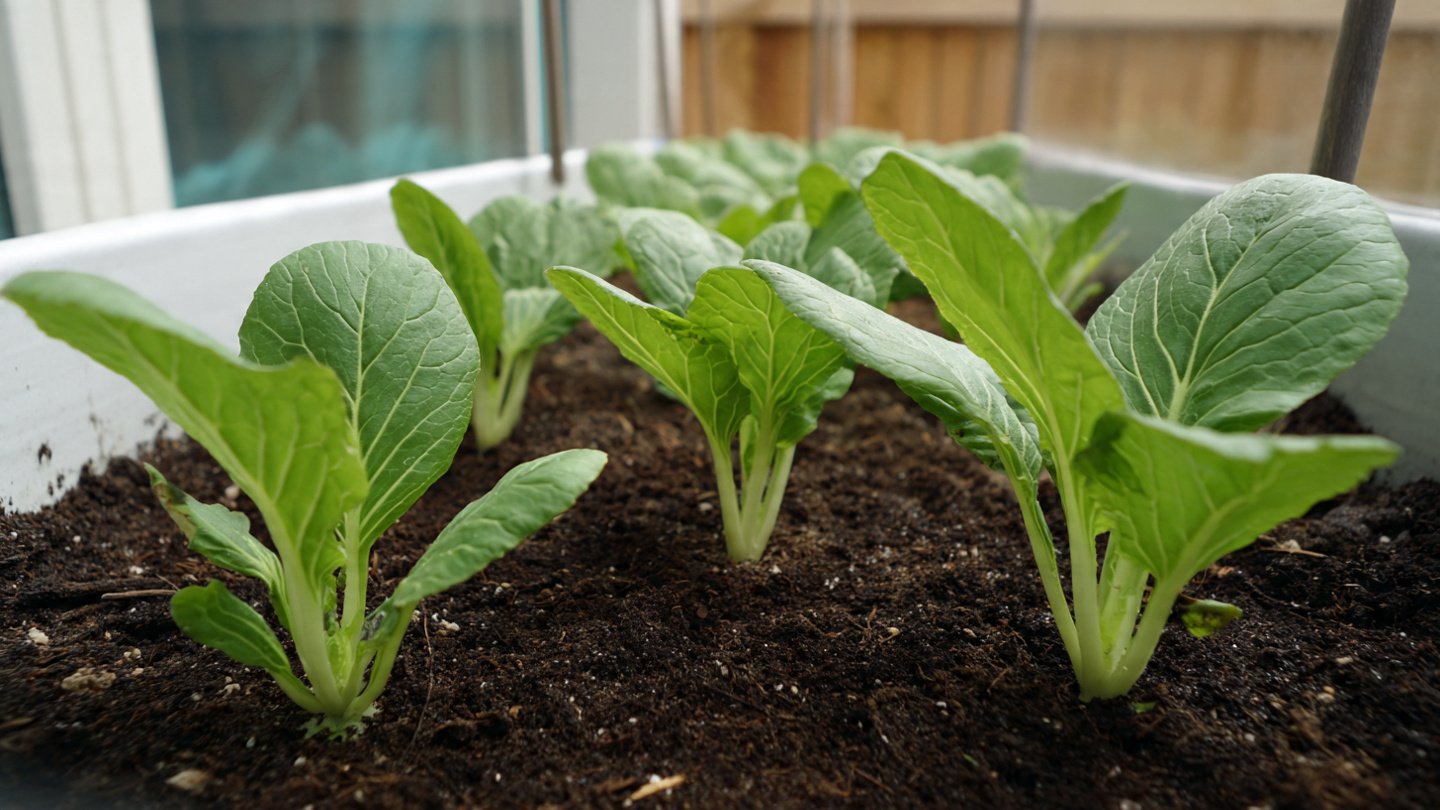
Pak Choi is a leafy green vegetable from the brassica family, which includes kale, broccoli, and cabbage. It features a light green stem and dark green leaves. With its crisp texture and mild flavor, it’s often used in stir-fries, salads, and soups. Not only does it taste great, but it’s also packed with nutrients, including vitamin C, vitamin K, calcium, and fiber.
Latest Posts
- A Comprehensive Guide to Successfully Growing Grape Vines in Your Backyard for Beginners and Experts Alike
- Best Tips for Successful Mango Growth in Containers
- Discover the Simple Steps for Successfully Growing Coriander in a Pot
- Discovering the Ultimate Guide to Growing African Violets from Leaf Cuttings
- Simple Techniques for Successfully Growing Seedless Grapes in Home Gardens
- Ultimate Guide to Growing Balsam Plants Naturally for Vibrant Blooms
- Discover the Secrets to Growing Lush Leek Leaves with Simple Hacks for Beginners
- How to Successfully Cultivate Sweet Cherries in the Unique Climate of Canada
- The Ultimate Guide to Successfully Growing Beautiful Succulent Garden Plants at Home
- A Comprehensive Guide to Growing Dhania from Seeds for Beginners
Why Grow Pak Choi at Home?
- Freshness: Homegrown Pak Choi is fresher than store-bought varieties, providing better flavor and nutrient retention.
- Cost-Effective: Growing your own greens can save you money, especially if you frequently purchase vegetables.
- Convenience: It’s easy to grow Pak Choi in containers or small gardens, making it accessible for urban gardeners.
- Health Benefits: Home gardening encourages healthy eating and offers the satisfaction of consuming your home-grown produce.
Getting Started: What You Need

Supplies
- Seeds: Purchase high-quality Pak Choi seeds from a reputable source.
- Container or Garden Bed: If you don’t have garden space, use containers with drainage holes.
- Potting Soil: Look for a nutrient-rich potting mix that retains moisture.
- Watering Can or Spray Bottle: For consistent watering.
- Fertilizer: Organic fertilizers like compost or balanced fertilizers are ideal.
Choosing the Right Location
Pak Choi grows best in cool conditions. Ideally, choose a spot that receives full sun for at least 4-6 hours a day but also offers some shade if temperatures rise above 80°F (26°C). A balcony, patio, or windowsill can serve as a suitable growing area if you’re short on space.
Step-by-Step Guide to Growing Pak Choi
Step 1: Seed Selection and Planting
- Timing: Pak Choi can be sown early in the spring or late summer for a fall crop. It thrives in cooler weather.
- Sow Seeds: In your container or garden bed, plant seeds about ¼ inch deep, spacing them about 6 inches apart to allow room for growth.
- Watering: Gently water the soil after planting, ensuring that it remains evenly moist but not waterlogged.

Step 2: Providing Optimal Growing Conditions
- Temperature: Ideal growing temperatures are between 45°F to 75°F (7°C to 24°C).
- Light Requirements: Ensure your plants get enough sunlight but consider partial shade in hotter months to prevent bolting (premature flowering).
- Humidity: Pak Choi loves humidity. If you’re in a dry climate, consider misting the plants occasionally or increasing humidity levels around them.
Step 3: Caring for Your Pak Choi
- Watering: Keep the soil consistently moist, especially during dry spells. Avoid letting the soil dry out completely.
- Fertilizing: About 2-3 weeks after sowing, use a balanced liquid organic fertilizer to encourage healthy growth. Follow the instructions on the package for proper dosing.
- Weeding: Regularly check for weeds around your plants, as they compete for nutrients and water.
- Pest Management: Watch for common pests like aphids and cabbage worms. Planting companion plants like marigolds can deter these pests.

Step 4: Harvesting Pak Choi
- Timing: Pak Choi is generally ready for harvest in about 30-45 days after planting, depending on the variety.
- Harvest Method: You can either:
- Cut the entire plant at the base using a sharp knife.
- Harvest individual leaves, allowing the plant to continue growing.
Step 5: Storage
Fresh Pak Choi can be stored in the refrigerator for up to a week. Wrap the greens in a damp paper towel and place them in a resealable bag to maintain their freshness.
Troubleshooting Common Issues
1. Yellowing Leaves
This could indicate overwatering, nutrient deficiencies, or pest problems. Check the soil moisture and consider applying a balanced fertilizer.

2. Bolting
If your Pak Choi flowers prematurely, it’s likely due to warm temperatures. This is normal; you can try planting in the cooler months to avoid this issue.
3. Pest Infestations
If you notice pests, apply an organic insecticide or use a homemade solution of soap and water. Regularly check the undersides of leaves where pests tend to hide.
FAQs
Q1: How often should I water Pak Choi?
A: Water your Pak Choi consistently, keeping the soil moist but not soggy. Check daily during hot weather.
Q2: Can I grow Pak Choi indoors?
A: Yes! Pak Choi can be successfully grown in pots indoors, given sufficient light and care.
Q3: What are the best companion plants for Pak Choi?
A: Companion plants that work well with Pak Choi include marigolds, garlic, and carrots, which can help deter pests.

Q4: How do I know when my Pak Choi is ready to harvest?
A: Your Pak Choi is ready when the leaves are well-formed and the plant is approximately 6-10 inches tall.
Q5: Is Pak Choi easy to grow for beginners?
A: Absolutely! Pak Choi is one of the easiest greens to grow, making it perfect for beginners and experienced gardeners alike.
Q6: Can Pak Choi be grown in winter?
A: While Pak Choi prefers cooler temperatures, growing it in winter can be possible with the use of a greenhouse or protective coverings.
Conclusion
Growing Pak Choi at home is a rewarding endeavor that not only enhances your culinary options but also nurtures your gardening skills. With its straightforward care requirements and quick turnaround time, you can enjoy fresh greens with minimal effort—perfect for any home gardener. Whether you’re considering small-scale gardening on your balcony or have a dedicated garden bed, Pak Choi can thrive in various environments. So roll up your sleeves, get your seeds ready, and start your journey toward homegrown vegetables today!