Karela, also known as bitter gourd or bitter melon, is a revered vegetable in many cuisines, especially in Asian and African cooking. Beyond its culinary uses, karela is celebrated for its medicinal properties, particularly in managing diabetes and improving digestion. For gardening enthusiasts or those with limited space, growing karela in containers is a practical approach that brings numerous benefits. In this article, we’ll explore how beginners can successfully cultivate karela in containers, ensuring a healthy and bountiful harvest.
Understanding Karela
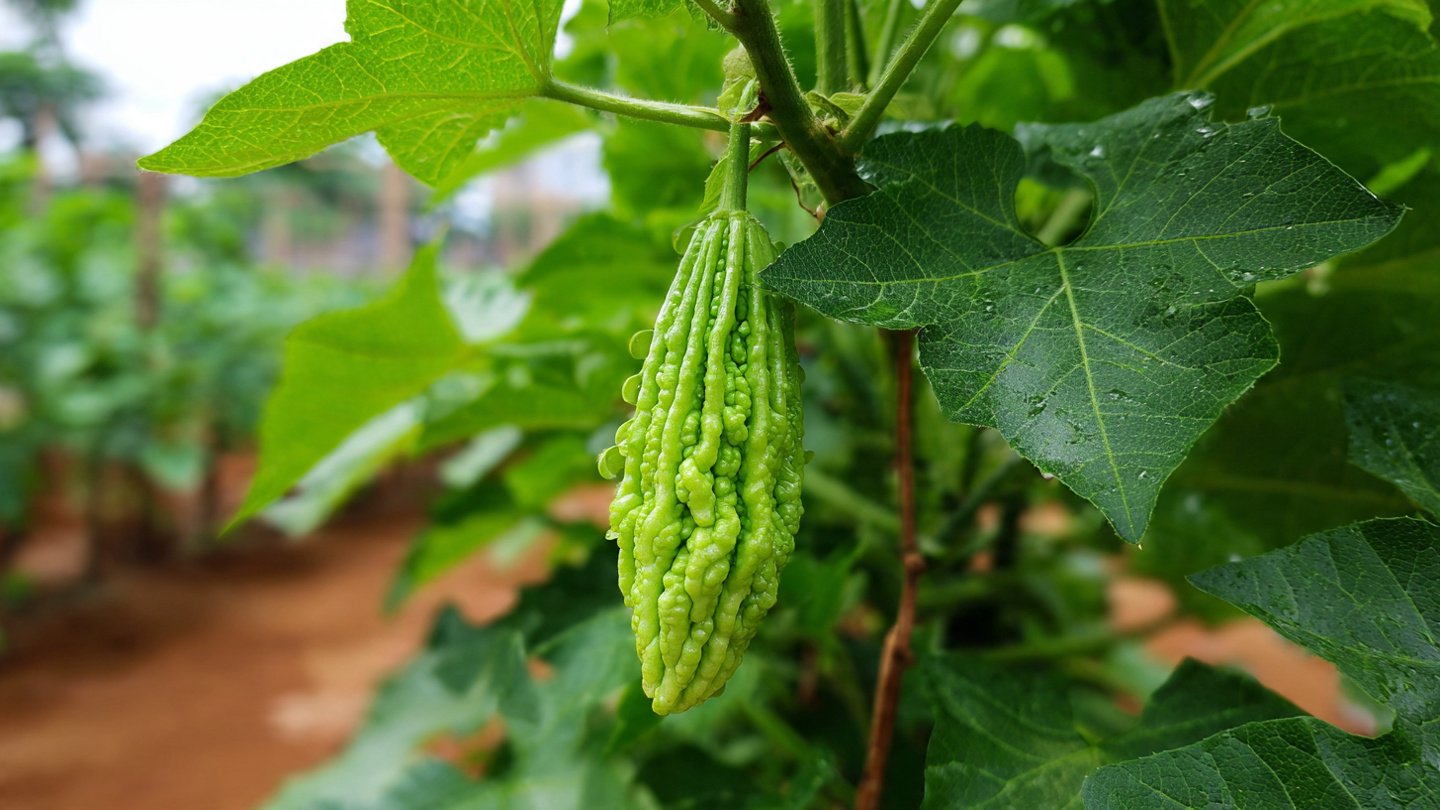
Karela (Momordica charantia) is a tropical vine that thrives in warm climates. Its distinctively bitter fruit is rich in vitamins A, C, and K, as well as minerals such as iron and potassium. The plant typically grows in a sprawling manner and features large, lobed leaves. Karela can be consumed in various forms: stir-fried, in curries, as juice, or even pickled.
Latest Posts
- A Comprehensive Guide to Successfully Growing Grape Vines in Your Backyard for Beginners and Experts Alike
- Best Tips for Successful Mango Growth in Containers
- Discover the Simple Steps for Successfully Growing Coriander in a Pot
- Discovering the Ultimate Guide to Growing African Violets from Leaf Cuttings
- Simple Techniques for Successfully Growing Seedless Grapes in Home Gardens
- Ultimate Guide to Growing Balsam Plants Naturally for Vibrant Blooms
- Discover the Secrets to Growing Lush Leek Leaves with Simple Hacks for Beginners
- How to Successfully Cultivate Sweet Cherries in the Unique Climate of Canada
- The Ultimate Guide to Successfully Growing Beautiful Succulent Garden Plants at Home
- A Comprehensive Guide to Growing Dhania from Seeds for Beginners
Benefits of Growing Karela in Containers
-
Space Efficiency: Container gardening is ideal for those with limited garden space or urban dwellers.
-
Mobility: Containers can be moved to capture optimal sunlight, especially in regions with variable weather.
-
Soil Control: You can customize the soil mix for best drainage and fertility.
-
Pest Management: Reduced ground contact can limit pest infestations.
Choosing the Right Container
Container Size
- Volume: A container should ideally hold 5-10 gallons of soil. This provides enough space for root development.
- Height: A depth of at least 12-14 inches is recommended to accommodate the plant’s roots.
Container Type

- Materials: Opt for containers made of plastic, ceramic, or wood. Ensure that they are durable and contain drainage holes to prevent waterlogging.
- Self-Watering Pots: These are particularly useful for beginners, as they help maintain consistent moisture levels.
Soil Requirements
Karela thrives in well-draining, nutrient-rich soil. A good potting mix should include:
- Organic Matter: Mix in compost or well-rotted manure to enhance soil fertility.
- Aeration: Use perlite or coconut coir to improve aeration and drainage.
- pH Level: Aim for a slightly acidic to neutral pH of around 6.0-7.0.
DIY Potting Mix
For a simple potting mix, combine the following in equal parts:
- Potting soil
- Compost
- Perlite or vermiculite
Mix thoroughly before filling your container.
Planting Karela Seeds
When to Plant
- Timing: Karela is a warm-season crop. The best time to plant is in late spring after the threat of frost has passed and soil temperatures are consistently above 70°F (21°C).

Seed Preparation
- Soaking: Soaking seeds in water for a few hours before planting can enhance germination rates.
- Planting Depth: Sow seeds about 1 inch deep in the soil.
Spacing
If planting multiple seeds in one container, ensure they are spaced about 6 inches apart to allow for healthy growth.
Watering
Karela plants require regular watering, especially during the growing season. However, it’s essential to strike a balance—overwatering can lead to root rot.
- Frequency: Water consistently, allowing the top inch of soil to dry out between waterings.
- Method: Water at the base of the plant rather than overhead to prevent fungal diseases.
Signs of Under or Overwatering
- Underwatering: Leaves may wilt or turn yellow.
- Overwatering: Leaves may become droopy, and roots may start rotting.
Sunlight Requirements
Karela plants thrive in full sunlight, needing at least 6-8 hours a day. If you don’t have a spacing that receives ample sunlight, consider using grow lights indoors.
- Placement: Position containers in a southern-facing location, if possible.
- Rotation: Rotate the container weekly for even growth.

Fertilizing
Karela plants benefit from regular feeding to promote growth and fruiting.
- Frequency: Fertilize every 2-4 weeks during the growing season.
- Type: Use a balanced liquid fertilizer with an NPK ratio of 5-10-10 or similar.
Organic Alternatives
For organic gardeners, consider compost tea or fish emulsion as natural fertilizer options.
Supporting the Vines
Karela plants are climbing vines, so providing adequate support is essential for healthy growth and easy harvesting.
- Trellis: Use a trellis, cage, or stakes to keep the plant upright.
- Height: Ensure the support system is tall enough, as karela can grow up to 6-10 feet in height.
Pest and Disease Management
Karela plants can be susceptible to pests such as aphids and whiteflies. Additionally, fungal issues may arise if the plants are too crowded or watered improperly.
Preventive Measures
- Inspection: Regularly check the leaves and stems for signs of pests or disease.
- Neem Oil: Apply neem oil or insecticidal soap as necessary to manage pests organically.

Common Issues
- Powdery Mildew: This can occur in high humidity. Ensure plants have adequate air circulation and avoid wetting the leaves.
- Blossom End Rot: Often related to inconsistent watering, maintain a steady watering schedule to prevent this issue.
Harvesting Karela
When to Harvest
Karela is traditionally harvested while young, when the fruits are green and roughly 6-8 inches long. Early harvesting ensures the bitterness is at a desirable level for cooking.
Harvesting Tips
- Use scissors or pruners: Gently cut the fruit from the vine to avoid damaging the plant.
- Regular Harvesting: Frequent harvesting encourages the plant to produce more fruit.
Post-Harvest Care
After harvesting, clean the fruits and store them in a cool, dry place. They can be kept in the refrigerator for up to a week.
FAQs
1. Can Karela be grown in all climates?
Karela thrives in warm, tropical climates. However, with proper care, it can be grown in cooler regions during the summer months.
2. How often should I fertilize my Karela plants?

Karela plants benefit from fertilization every 2-4 weeks during the growing season. Adjust frequency based on the growth performance of the plant.
3. What is the ideal temperature for growing Karela?
Karela grows best in temperatures between 70°F and 90°F (21°C to 32°C). It’s sensitive to frost, so ensure to plant after the last frost date.
4. Can I grow Karela indoors?
Yes, Karela can be grown indoors as long as it receives ample sunlight (6-8 hours) and is adequately supported.
5. What should I do if my Karela leaves turn yellow?
Yellowing leaves can indicate overwatering, lack of nutrients, or possible pest infestations. Assess your watering schedule and inspect for pests.
6. How long does it take for Karela to grow from seed to harvest?
Karela typically takes about 55-70 days from seed to harvest, depending on the variety and environmental conditions.
Conclusion
Growing karela in containers is not only feasible for beginners but also rewarding. With the right container, soil, watering practices, and care, you can achieve fruitful harvests of this nutritious vegetable. Whether you enjoy it in a stir-fry or as part of a traditional dish, having fresh karela at your fingertips is a delight for any home cook. Happy gardening!