Moringa, often referred to as the “miracle tree,” is renowned for its nutritional benefits and versatility in cooking. Whether you want to enjoy its leaves in salads, boil its pods, or simply grow a beautiful plant in your garden, knowing how to propagate Moringa can be quite rewarding. This article will guide you through a simple trick to grow Moringa from cuttings using just water and a bit of patience. By the end, you will also find frequently asked questions to clarify any doubts.
Understanding Moringa
Moringa (Moringa oleifera) is native to parts of Africa and Asia, but its cultivation has spread worldwide due to its numerous health benefits. Its leaves, pods, flowers, and seeds are all edible and are used in various culinary dishes and traditional medicines. Moringa is prized for its high protein content, vitamins, and antioxidants.
Latest Posts
- A Comprehensive Guide to Successfully Growing Grape Vines in Your Backyard for Beginners and Experts Alike
- Best Tips for Successful Mango Growth in Containers
- Discover the Simple Steps for Successfully Growing Coriander in a Pot
- Discovering the Ultimate Guide to Growing African Violets from Leaf Cuttings
- Simple Techniques for Successfully Growing Seedless Grapes in Home Gardens
- Ultimate Guide to Growing Balsam Plants Naturally for Vibrant Blooms
- Discover the Secrets to Growing Lush Leek Leaves with Simple Hacks for Beginners
- How to Successfully Cultivate Sweet Cherries in the Unique Climate of Canada
- The Ultimate Guide to Successfully Growing Beautiful Succulent Garden Plants at Home
- A Comprehensive Guide to Growing Dhania from Seeds for Beginners
Why Grow Moringa from Cuttings?
- Quick and Easy: Propagating Moringa from cuttings is a faster method compared to growing from seeds.
- Guaranteed Genetics: Growing from cuttings ensures that the new plant will be genetically identical to the parent plant.
- Low Cost: It’s an economical way to obtain new plants without having to purchase seeds or seedlings.
The Materials You Need
Before getting started with the propagation process, gather the following materials:

- Moringa Cuttings: Choose healthy cuttings that are about 1 to 2 feet long and at least half an inch in diameter. Make sure the cuttings are taken from a healthy Moringa tree.
- Water Container: Any clean container that can hold water will work. Glass jars or plastic bottles are common choices.
- A Warm, Bright Location: Moringa loves the sun, so find a sunny window or a spot that gets partial sunlight.
- Patience: Allow the cuttings some time to root.
Step-by-Step Guide to Grow Moringa from Cuttings
Step 1: Prepare Your Cuttings
- Choose Healthy Cuttings: Look for cuttings that are firm and free from pests or diseases. Ideally, they should be taken from a mature tree.
- Trim Excess Leaves: If your cuttings have leaves, trim them back a bit. This reduces water loss and stress on the cutting, allowing it to focus energy on root development.
Step 2: Place Cuttings in Water
- Fill Your Container with Water: Fill your container with clean, preferably distilled water to avoid any chemicals found in tap water.
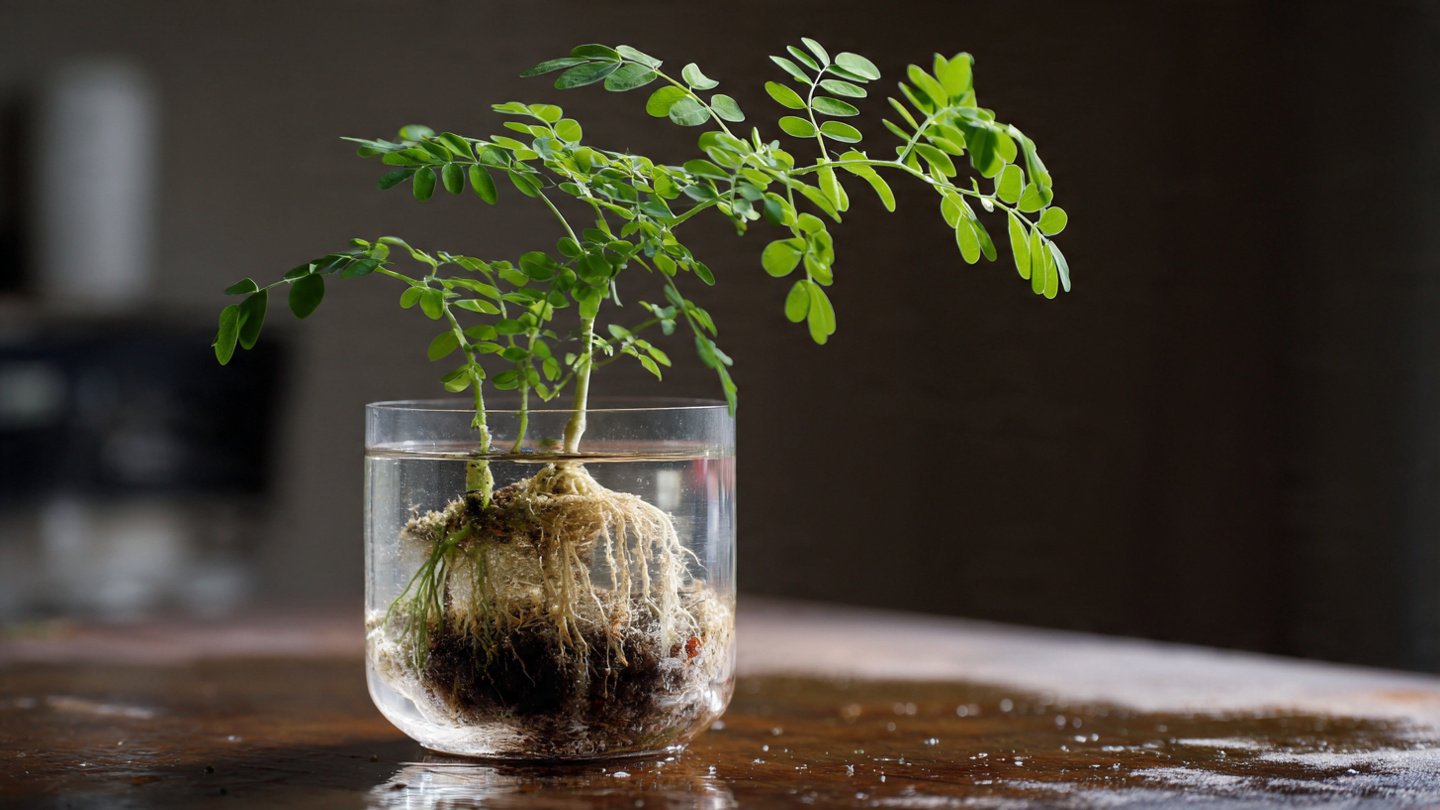
- Submerge the Cuttings: Place the trimmed end of the cuttings into the water. Ensure that at least one node (the small bump where leaves meet the stem) is submerged. The node is crucial for root development.
- Positioning: Keep the cuttings upright to prevent them from sinking or rearranging in the water.

Step 3: Location and Care
- Bright but Indirect Sunlight: Place the container in a bright location where it will receive indirect sunlight. Direct sunlight can heat the water and damage the cuttings.
- Change Water Regularly: Change the water every few days to keep it fresh and oxygenated. This prevents bacteria growth which can harm the cuttings.
Step 4: Wait for Roots to Develop
- Monitor Progress: After about a week, you should start to see small roots forming from the submerged nodes. While this can take anywhere from 2 to 4 weeks, patience is crucial.
- Watch for Growth: As roots begin to grow, you may also notice new leaves developing. This is a good sign that the cutting is healthy and establishing itself.
Step 5: Transplanting Your Moringa Cuttings
- Prepare a Pot: Once the roots are about 2-3 inches long, it’s time to transplant your cuttings into soil. Use a light, well-draining potting mix, preferably one designed for seedlings or herbs.
- Transplanting Method: Carefully remove the cutting from the water, ensuring you don’t damage the roots. Make a small hole in the soil, place the cutting in it, and gently pack the soil around it.
- Watering: Water the soil lightly after transplanting. Ensure the soil remains moist but not waterlogged.

Step 6: Caring for Your Newly Transplanted Moringa
- Sunlight: Place the pot in a sunny location that receives at least 6 hours of sunlight each day.
- Watering Schedule: Water the plant when the top inch of soil feels dry. Moringa is drought-tolerant, but young plants need regular moisture until established.
- Fertilizing: Once your Moringa is well-rooted and growing, you may want to introduce a balanced fertilizer. This can help enhance growth and leaf production.
Step 7: Enjoying Your Moringa Plant
- Once your Moringa plant has established itself, you can begin to enjoy its nutritional benefits. Fresh Moringa leaves can be harvested regularly for use in cooking, smoothies, and salads.
Frequently Asked Questions (FAQs)
1. How long does it take for Moringa cuttings to root?

It typically takes about 2 to 4 weeks for Moringa cuttings to develop roots in water, depending on the environmental conditions.
2. What type of water should I use for rooting?
Distilled or rainwater is ideal, as it is free from chemicals and impurities found in tap water.
3. Can I grow Moringa in a pot?
Yes, Moringa can be successfully grown in pots. Make sure the pot has good drainage and is large enough to accommodate the growing roots.
4. How much sunlight does a Moringa tree need?
Moringa thrives in full sun and needs at least 6 hours of sunlight per day for optimal growth.
5. How do I know when to harvest Moringa leaves?
You can begin harvesting Moringa leaves once the tree is established and has plenty of foliage. Leaves can be picked regularly, but never remove more than one-third of the plant at once.

6. Are there any pests or diseases I should watch out for?
While Moringa is relatively pest-resistant, keep an eye out for common pests like aphids and spider mites. Ensure good air circulation to prevent diseases.
7. Can I grow Moringa indoors?
While Moringa can be grown indoors, ensure it gets enough light. A south-facing window or grow lights can be beneficial.
Conclusion
Growing Moringa from cuttings in water is a straightforward, economical way to enjoy this versatile plant. With just a few materials and a bit of patience, you can cultivate a thriving Moringa tree in your home or garden. By following the steps outlined above, you’ll soon enjoy the beauty and benefits of this remarkable plant. Happy gardening!