Hoya plants, commonly known as wax plants, are beloved for their thick, waxy leaves and fragrant, star-shaped flowers. These tropical plants are relatively easy to care for, making them a favorite among houseplant enthusiasts. Propagating Hoya plants from cuttings is an accessible way to expand your plant collection, share with friends, or simply enjoy the satisfaction of growing plants from scratch. In this article, we will guide you through easy steps to successfully grow Hoya plants from cuttings at home.
Understanding Hoya Plants
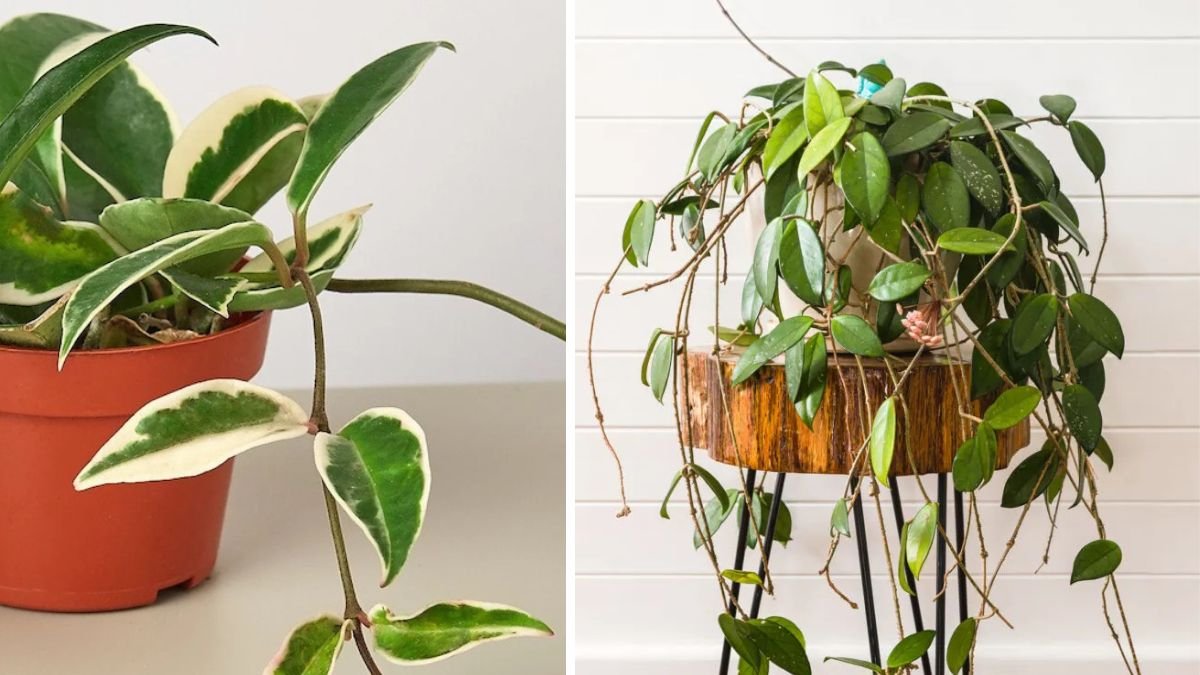
Before diving into propagation, it’s essential to understand a bit about Hoya plants. There are over 200 species of Hoya, each with unique characteristics. Common types include Hoya carnosa, Hoya australis, and Hoya pubicalyx. These plants are typically epiphytic, meaning they grow on other plants rather than in the soil. They thrive in warm, humid environments and prefer bright, indirect light.
Latest Posts
- A Comprehensive Guide to Successfully Growing Grape Vines in Your Backyard for Beginners and Experts Alike
- Best Tips for Successful Mango Growth in Containers
- Discover the Simple Steps for Successfully Growing Coriander in a Pot
- Discovering the Ultimate Guide to Growing African Violets from Leaf Cuttings
- Simple Techniques for Successfully Growing Seedless Grapes in Home Gardens
- Ultimate Guide to Growing Balsam Plants Naturally for Vibrant Blooms
- Discover the Secrets to Growing Lush Leek Leaves with Simple Hacks for Beginners
- How to Successfully Cultivate Sweet Cherries in the Unique Climate of Canada
- The Ultimate Guide to Successfully Growing Beautiful Succulent Garden Plants at Home
- A Comprehensive Guide to Growing Dhania from Seeds for Beginners
Step-by-Step Guide to Propagating Hoya Plants
1. Gather Your Supplies
Before starting the propagation process, it’s essential to gather all the necessary materials:
- Healthy Hoya Plant: Choose a plant that is disease-free and healthy.
- Sharp, Clean Scissors or Pruners: Ensuring your cutting tools are clean helps prevent the spread of disease.
- Potting Mix: A well-draining potting mix is crucial for Hoya propagation.
- Containers: Small pots or propagation trays work well.
- Water: Distilled or rainwater is preferable, as tap water may contain chemicals harmful to plants.
- Plastic Bag or Cling Film: This can help maintain humidity around the cuttings.
- Rooting Hormone (optional): While not necessary, rooting hormone can encourage faster root development.
2. Taking Cuttings
Select healthy stems from your Hoya plant. Here’s how to take cuttings:
-
Choose the Right Stem: Look for a stem with at least two to three healthy leaves and a couple of nodes (the bumps on the stem where leaves grow).

-
Make the Cut: With clean scissors, cut just below a node. A cutting that is about 4–6 inches long is ideal.
-
Remove Lower Leaves: Trim off the leaves closest to the cut end. This helps prevent rot when submerged in water or planted in soil.
3. Prepare the Cuttings
Once you’ve made the cuttings, it’s time to prepare them:
-
Optional – Dip in Rooting Hormone: If using rooting hormone, dip the cut end of the cutting into the hormone. This can promote root growth.
-
Water or Soil Method: Decide whether you want to propagate your cuttings in water or directly in soil.
-
Water: Place the cut end of the cutting in a glass of water. Ensure that no leaves are submerged as this can lead to rot. Place the container in bright, indirect light.
-
Soil: Fill a small pot with a well-draining potting mix. Moisten the soil slightly, then insert the cutting into the soil, ensuring the node is buried. Water lightly after planting.
-
4. Provide the Right Environment
Regardless of the propagation method chosen, maintaining the proper environment is key:
-
Humidity: Hoya cuttings thrive in high humidity. If propagating in soil, cover with a plastic bag or cling film to create a mini greenhouse. For cuttings in water, just ensure they’re kept in a humid environment.

-
Light: Place your cuttings in a spot with bright, indirect light. Avoid direct sunlight, which can scorch the leaves.
-
Temperature: Hoya plants prefer warm temperatures (65-80°F). Avoid drafts and cold spots in your home.
5. Monitor and Maintain
Once your cuttings are settled, regular monitoring is essential:
-
Check Water Levels (if propagating in water): Change the water every week to prevent stagnation and encourage healthy root development.
-
Watering (if in soil): Keep the soil lightly moist but not soggy. Overwatering can lead to root rot.
-
Humidity Levels: If you notice the leaves starting to droop, it may indicate insufficient humidity.
6. Roots Development
After a few weeks, you should begin to see root development.
-
In Water: Roots should become visible after approximately 2–4 weeks. When they’re at least a couple of inches long, you can transplant them into the soil.
-
In Soil: Gently tug on the cuttings to check for resistance; this indicates root growth. Typically, roots will develop within 4–6 weeks.

7. Transplanting
If you started your cuttings in water, it’s time to transplant them into pots:
-
Choose the Right Pot Size: Select a pot that’s slightly larger than the cutting’s root ball.
-
Prepare the Soil: Use fresh, well-draining potting mix.
-
Transplant: Gently remove the cutting from the water and carefully place it in the pot, covering the roots with soil. Water lightly to settle the soil.
8. Ongoing Care
After transplanting, give your new Hoya plant some love:
-
Water: Continue to keep the soil lightly moist. Gradually allow the top inch of soil to dry out between waterings.
-
Light: Ensure continued exposure to bright, indirect light to encourage growth.
-
Fertilizing: After a month, you can start feeding your Hoya plant once a month with a balanced liquid fertilizer diluted to half-strength during the growing season (spring and summer).
9. Patience is Key
Growing Hoya plants from cuttings requires patience. While some cuttings may root quickly, others may take longer. Regularly check your plants for signs of growth, and continue providing care.

10. Troubleshooting Common Issues
While Hoya plants are relatively low-maintenance, you may encounter some issues:
-
Yellow Leaves: This may indicate overwatering. Allow the soil to dry out before watering again.
-
Brown Spots: This could be a sign of underwatering or exposure to direct sunlight. Adjust care accordingly.
-
Drooping Leaves: Often a sign of low humidity or underwatering. Use a humidity tray or mist the plant occasionally to increase moisture levels.
FAQs
1. How long does it take for Hoya cuttings to root?
Hoya cuttings typically root within 2 to 6 weeks, depending on environmental conditions and care.
2. Can I propagate Hoya plants in water indefinitely?
While Hoya cuttings can survive in water for some time, they are best transplanted into soil for long-term health and growth.
3. What lighting conditions do Hoya plants prefer?
Hoya plants thrive in bright, indirect sunlight. Too much direct sunlight can scorch the leaves.

4. Should I use rooting hormone for Hoya cuttings?
Using rooting hormone is optional. While it can speed up root development, many gardeners find success without it.
5. How often should I water Hoya cuttings?
Keep the soil lightly moist but not soggy. For cuttings in water, change the water weekly and maintain moisture.
6. Can I propagate Hoya plants during any season?
Hoya plants can be propagated year-round; however, spring and summer are ideal due to increased growth and light conditions.
7. Is it possible to propagate a Hoya plant from a single leaf?
Hoya plants typically require a cutting with at least one node (the bumpy part of the stem) to successfully root. A single leaf without a node will not develop roots.
Conclusion
With a little patience and care, you can successfully grow Hoya plants from cuttings at home. Whether you’re expanding your collection or sharing with friends, propagating these beautiful plants is a rewarding endeavor. By following the easy steps outlined in this guide, you’ll be well on your way to enjoying the beauty of Hoya plants in your home. Happy gardening!