Microgreens are not just a trendy garnish; they are nutritional powerhouses packed with vitamins, antioxidants, and flavors. Growing microgreens at home is an easy and rewarding endeavor, requiring minimal space and resources. This comprehensive guide aims to provide you with the essential techniques to cultivate microgreens effortlessly.
What Are Microgreens?
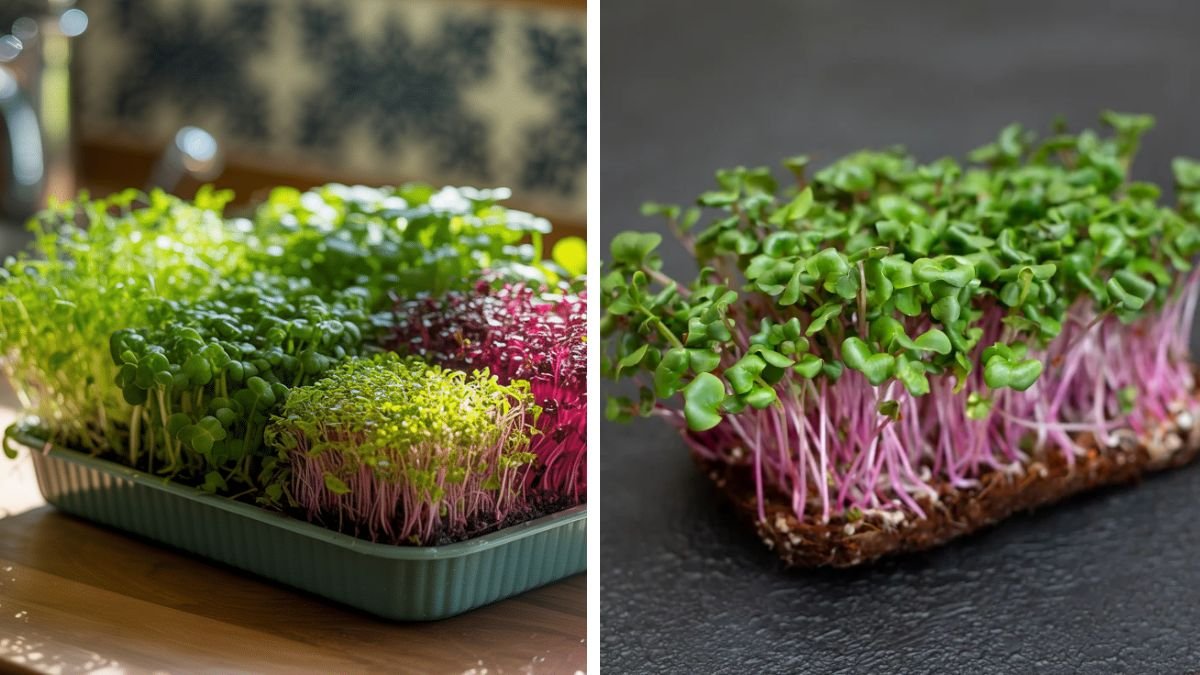
Microgreens are young, edible plants harvested just after the first true leaves have developed, typically within 7 to 21 days after germination. They come from various families of plants, including herbs, vegetables, and even some grains. Popular varieties include:
Latest Posts
- A Comprehensive Guide to Successfully Growing Grape Vines in Your Backyard for Beginners and Experts Alike
- Best Tips for Successful Mango Growth in Containers
- Discover the Simple Steps for Successfully Growing Coriander in a Pot
- Discovering the Ultimate Guide to Growing African Violets from Leaf Cuttings
- Simple Techniques for Successfully Growing Seedless Grapes in Home Gardens
- Ultimate Guide to Growing Balsam Plants Naturally for Vibrant Blooms
- Discover the Secrets to Growing Lush Leek Leaves with Simple Hacks for Beginners
- How to Successfully Cultivate Sweet Cherries in the Unique Climate of Canada
- The Ultimate Guide to Successfully Growing Beautiful Succulent Garden Plants at Home
- A Comprehensive Guide to Growing Dhania from Seeds for Beginners
- Basil
- Radish
- Broccoli
- Sunflower
- Pea Shoots
Benefits of Growing Microgreens
-
Nutritional Advantages: Microgreens are often richer in nutrients than their mature counterparts. For instance, red cabbage microgreens have been shown to contain up to 40 times more nutrients than adult cabbage.
-
Flavor: Microgreens can enhance the flavor of your dishes. With diverse varieties, they can offer spicy, sweet, or nutty tastes.
-
Quick Growth: Unlike traditional gardening, microgreens mature quickly, allowing for multiple harvests within a single growing season.
-
Low Space Requirements: Microgreens can be grown in small containers, making them ideal for apartments or small homes.

-
Year-Round Cultivation: Since they thrive indoors, you can grow microgreens throughout the year, regardless of the season.
Basic Steps to Grow Microgreens
Step 1: Gather Your Supplies
To start growing microgreens, you’ll need the following:
-
Seeds: Choose high-quality seeds from a reputable source. Look for seeds specifically labeled for microgreens or those that are untreated and organic.
-
Growing Medium: You can use various mediums like potting soil, coconut coir, or even specialized microgreens soil mixes.
-
Containers: Trays, shallow bins, or even repurposed containers can work. Ensure they have drainage holes.
-
Water: A spray bottle is ideal for misting the seeds and keeping the soil moist without making it soggy.
-
Light: A sunny windowsill or grow lights will provide the necessary light for healthy growth.
Step 2: Choose Your Seeds
Select the varieties of microgreens that suit your taste and culinary needs. Keep in mind that some seeds are easier to grow than others. A beginner might start with:

- Radish: Fast-growing and spicy.
- Sunflower: Nutty flavor and easy to grow.
- Peas: Sweet and tender.
Step 3: Prepare the Containers
-
Fill Containers: Add your growing medium to the trays, filling them about 1 to 2 inches deep.
-
Level the Surface: Smooth out the surface to create an even growing area.
-
Moisten the Soil: Before sowing the seeds, spray the soil with water to ensure it is damp but not overly wet.
Step 4: Sow the Seeds
-
Even Distribution: Sprinkle the seeds evenly across the surface of the moist soil. Avoid overcrowding; give them enough space to grow.
-
Light Coverage: If required, lightly cover the seeds with a thin layer of growing medium.
Step 5: Watering
Use a spray bottle to mist the seeds gently. Ensure the seeds are moist but not waterlogged.

Step 6: Create the Right Environment
-
Light: Place the trays in a bright location, preferably 4 to 6 hours of direct sunlight each day. If sunlight is limited, consider using grow lights.
-
Temperature: The ideal temperature for germination is between 65°F and 75°F (18°C to 24°C).
-
Humidity: Cover the trays with a humidity dome or a clear plastic lid to retain moisture for the first few days.
Step 7: Monitor Growth
-
Check Moisture Levels: Daily, mist the microgreens to maintain moisture.
-
Remove Covers: Once the seeds germinate and you see sprouts, remove any coverings to allow for airflow and prevent mold.
Step 8: Harvesting
Microgreens are typically ready to harvest within 7 to 21 days, depending on the variety. When they have developed their first true leaves, it’s time to harvest.
-
Use Sharp Scissors: Cut the microgreens just above the soil level.
-
Handle with Care: Place them gently into a container or salad bowl.

-
Storage: Keep your harvested microgreens in a sealed container in the refrigerator for up to a week for optimal freshness.
Advanced Tips for Growing Microgreens
-
Sequential Sowing: To have a continuous supply, stagger your sowing every week or two.
-
Mix Varieties: Create a mix of microgreens for varied flavor profiles and textures.
-
Fertilization: While most microgreens do not require additional nutrients, a diluted liquid fertilizer can boost growth if desired.
-
Pest Management: Microgreens are less prone to pests, but keep an eye on them. Use natural remedies or insecticidal soap if you encounter issues.
-
Experiment: Don’t be afraid to try different seeds, textures, and flavors. Each variety offers unique taste experiences.
Common Issues and Solutions
-
Mold Growth: Ensure proper air circulation and avoid excessive watering.
-
Leggy Growth: If your microgreens are tall and spindly, they may not be getting enough light. Move them to a brighter spot or adjust your grow lights.
-
Slow Growth: Check the moisture levels and temperature. If they are too cold or dry, it can stunt growth.

FAQs
Q1: How long does it take to grow microgreens?
A1: Most microgreens take between 7 to 21 days from seed to harvest, depending on the variety.
Q2: Can I grow microgreens indoors?
A2: Yes, microgreens thrive indoors in areas with bright, direct sunlight or under grow lights.
Q3: Do I need special equipment to grow microgreens?
A3: No, you can grow microgreens with basic supplies available at home, such as containers, soil, and seeds.
Q4: How do I store harvested microgreens?
A4: Store harvested microgreens in a sealed container in the refrigerator for up to a week.
Q5: Can I reuse the soil for microgreens?
A5: It’s not recommended to reuse soil, as it may harbor diseases and pests. Fresh soil ensures a healthier crop.
Q6: What is the difference between microgreens and sprouts?
A6: Microgreens are harvested after the first true leaves have developed, while sprouts are eaten at the germination stage.
Q7: Are microgreens good for health?
A7: Yes, microgreens are nutrient-dense and can enhance your diet with vitamins, minerals, and antioxidants.
Conclusion
Growing microgreens is an easy and satisfying gardening activity that brings fresh flavors and nutrition to your meals. Whether you live in a small apartment or have a spacious home, anyone can grow microgreens with minimal resources. Follow the steps outlined in this guide, and soon you’ll be enjoying the crisp, delightful taste of your own home-grown microgreens. Happy gardening!